
Why Earthing Is the Life Insurance of Your Solar System
A rooftop solar system sits at the highest elevation of your house, made of large aluminum frames, steel mounting structures, and high-voltage electrical circuits. During the monsoon season, this makes your rooftop a prime target for static electrical discharge and direct or indirect lightning strikes.
Without proper Earthing (Grounding), a single lightning strike or high-voltage leakage will instantly destroy your ₹50,000 inverter, fry your home's air conditioners and televisions, and create severe electric shock hazards for anyone walking on your terrace. Earthing is not an optional accessory—it is the foundational safety barrier of your entire home.
What Is "Chemical Earthing" and Why Is It Superior?
Years ago, traditional earthing used simple GI pipes buried in the ground with alternating layers of common salt and charcoal. While cheap, traditional earthing has a fatal flaw: during dry Indian summers, the salt leaches away, the charcoal dries out, and the electrical resistance shoots through the roof. Homeowners were forced to pour buckets of water down the pipe every week.
Modern solar installations strictly mandate Chemical Earthing compliant with Indian Standard IS 3043:
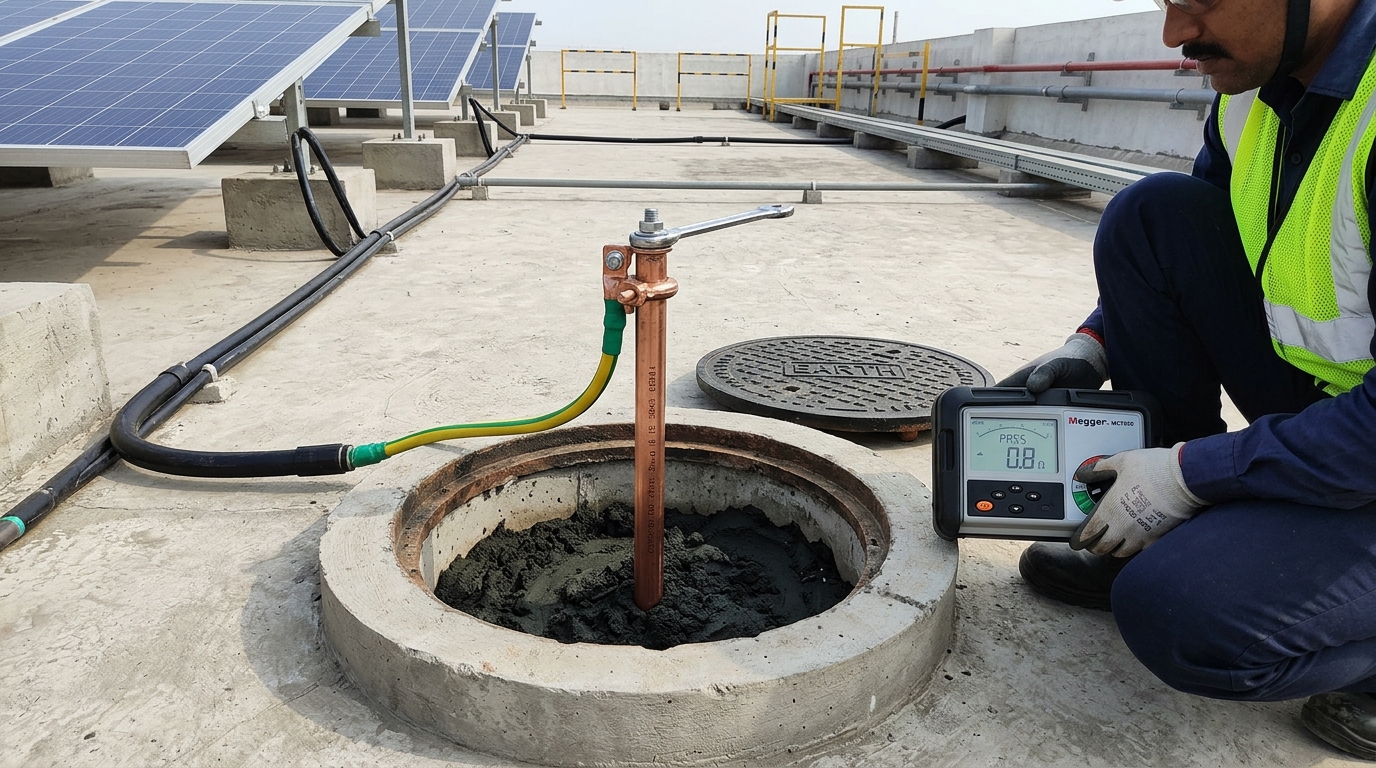
- Copper-Bonded Steel Electrodes: A solid high-tensile steel rod coated with a 250-micron molecular layer of pure copper. It provides structural strength to drive 8 to 10 feet into the earth while resisting corrosion for 25+ years.
- Earth Enhancing Compound (Bentonite / Carbon Compound): Instead of salt and charcoal, the borehole is filled with a specialized hygroscopic compound that naturally absorbs and retains moisture from surrounding soil, guaranteeing a permanently low-resistance electrical path to ground.
The Mandatory "3-Pit Earthing Rule" Every Homeowner Must Know
One of the most dangerous shortcuts taken by cheap installers is digging only one earthing pit and connecting everything to it—or worse, connecting the solar system to your home's existing domestic earthing!
Under MNRE and state DISCOM net-metering regulations, a safe rooftop installation requires three dedicated, separate earthing pits:
Pit 1: The Inverter Ground
Dedicated solely to the inverter's chassis and internal electrical components. If any alternating current (AC) fault occurs inside the inverter, this pit immediately trips the circuit breaker without energizing other appliances.
Pit 2: The Structure and DCDB Ground
Connects all aluminum solar panel frames, the galvanized steel mounting structure on your roof, and the DC Surge Protection Device (SPD). This drains away all static electricity and prevents electric shock when touching the metal structure.
Pit 3: The Dedicated Lightning Arrester (LA) Ground
Crucial Safety Rule: The lightning arrester MUST have its own independent earthing pit! Lightning carries up to 30,000 to 100,000 Amperes of current. If the lightning rod is connected to the same earthing pit as your inverter, a lightning strike will send a massive backward voltage surge straight into your inverter and your home wiring, destroying everything in a fraction of a second.
What Earth Resistance Value (Ω) Should Your Megger Test Show?
When the installation is complete, the installer must test each pit using a specialized instrument called an Earth Resistance Tester (Megger):
- Under IS 3043: Total earth resistance must ideally be below 1.0 Ohm (≤ 1.0 Ω), and in rocky soil must never exceed 5.0 Ohms (≤ 5.0 Ω).
- If the reading is above 5 Ohms, the earthing is ineffective. The electricity board inspector will fail your site inspection and refuse to install your net meter until deeper pits or additional rods are added.
Homeowner's Earthing Audit Checklist
- Count the pits: Verify that your contractor actually dug 3 distinct earthing pits separated by at least 2 to 3 meters from each other.
- Check the rod: Ensure the copper-bonded electrode is at least 10 feet (3 meters) long with a minimum 14mm to 17mm diameter.
- Inspect the chamber: Each pit must be finished with a heavy-duty PVC or brick inspection chamber with a removable lid so the terminal connections can be inspected annually.
- Demand the Test Certificate: Ask the installer to show you the digital earth resistance meter display and record the tested Ohms reading on your commissioning certificate.